Project Sharing and Collaboration
A Project can be shared with your colleagues
- Individually, or
- With a Team
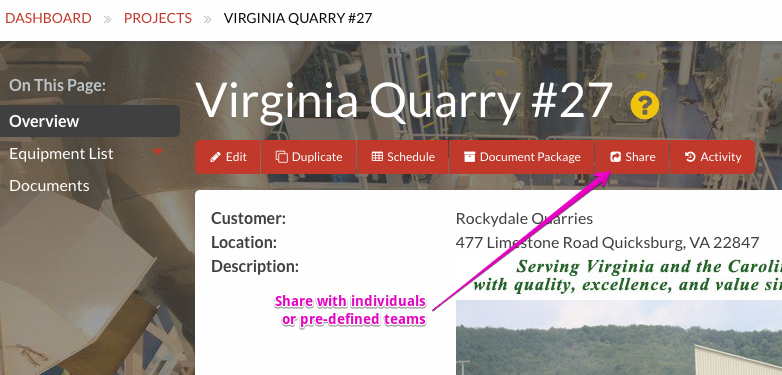
On the Project page, simply click on the "Share" button to start (or later on, to change sharing):
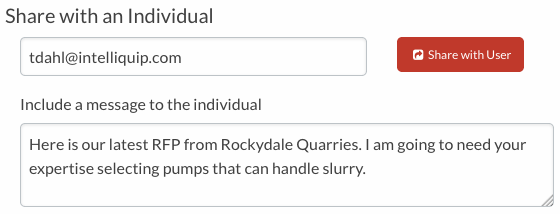
Share with a Colleague
Enter the email of the user, add an optional message, and click 'Share
with User' to allow the user to see this project. The user will receive
an email with a link to the project.
No user was found for that email?
The user must already be registered in the system. If not, you will get an error like this:

Ask the user to register.
Future Feature: We will be supporting sharing a private link with unregistered users in the future.
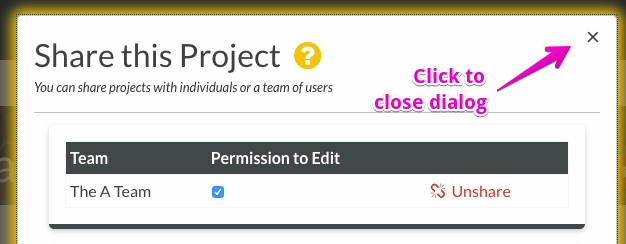
Controlling Access Rights
By default, all users and teams only receive read-only access to the
project. Click the checkbox next to the users and teams that you want to
allow project and item edit rights and the ability add new items to the
project.
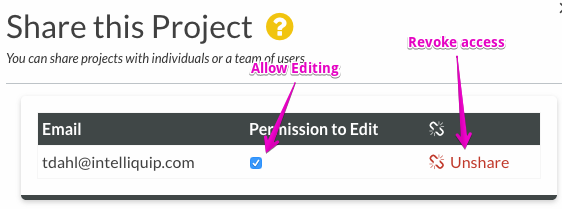
Click 'Unshare' to immediately revoke all viewing rights to the project for the selected user or team.
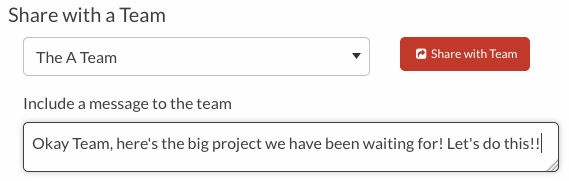
Share with Team
Choose a team (created beforehand), add an optional message, and click
'Share with Team' to allow all users in the team to see the project. The
users will each receive an email with a link to the project.
Similar to sharing with individual users, you can control the edit rights:

Close the Share Dialog
You can press Esc, click outside of the dialog, or click the 'X' in the upper right corner
Edit the Share settings for the Project
Click 'Share' button anytime to edit the sharing.
Customer support service by UserEcho
